

If you work in the manufacturing, food processing, mining, or agriculture industries, you know how critical it is to move bulk materials efficiently, safely, and cost-effectively through your facility. That’s where pneumatic conveying lines come in — they move powders, granules, pellets, and other dry bulk goods using the power of pressurized air, eliminating the need for messy, labor-intensive manual handling and reducing the risk of cross-contamination. But designing or installing a pneumatic conveying line isn’t just about picking up a few pipes and hooking them up. Cut corners on the installation requirements, and you’ll end up with frequent clogs, higher energy bills, inconsistent performance, and even safety hazards down the line. As a conveying line supplier with 15 years of experience helping customers across North America and Europe get their systems right, I’ve seen firsthand how small installation missteps can turn a great concept into a frustrating headache. Today, I’m breaking down the non-negotiable installation requirements for a reliable pneumatic conveying line, and explaining why getting these details right will save you time, money, and stress in the long run.
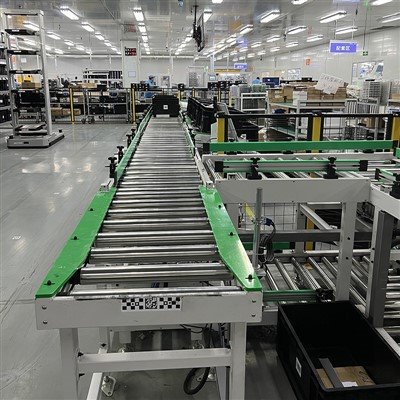
First, before you even touch a pipe or a valve, you need to nail down the site-specific conditions that will shape every part of your installation. This isn’t a one-size-fits-all technology — a system that works for moving plastic pellets at a petrochemical plant will struggle to move fine, flour-like powder in a bakery, so your site’s unique factors have to guide every choice. Let’s start with space. Pneumatic conveying lines aren’t as bulky as some mechanical systems, but they still need room for straight runs, bends, and critical components like blowers, filters, and feeders. That’s a big contrast to mechanical conveyors like roller or belt systems, which require more floor space or ceiling clearance for their moving parts. For example, if you’re working in a tight warehouse, you might find that a gravity roller conveyor is easier to fit into narrow aisles, but a pneumatic line can be routed vertically through unused overhead space to move materials between floors without taking up valuable floor real estate. Wait — I should note that mechanical conveyors like conveyor belts or rollers are great for specific tasks, but if your goal is to move bulk materials quickly and with minimal labor, pneumatic lines often outperform them. But to make that work, you need to measure every inch of your site: ceiling height, wall obstructions, the location of existing electrical panels, and even how much headroom you have at loading and discharge points. I’ve had customers tell me they installed a pneumatic line only to realize their ceiling was too low to fit the blower unit above the production floor — forcing them to cut a hole in the wall to tuck it in, which added weeks of work and thousands of dollars in unexpected costs.
Next, atmospheric conditions and site utilities play a huge role in successful installation. Let’s start with power. Pneumatic conveying relies on blowers or compressors to generate the air pressure needed to move materials, and those units need stable, consistent power to run efficiently. If your site has frequent power outages, or if the electrical service is outdated and can’t handle the peak load of the blower, you’ll run into issues like inconsistent air flow, which causes clogs. We always recommend working with your electrician to upgrade your service if needed, and installing a backup generator if your operations run 24/7 — downtime from a power-related clog in a food processing plant, for example, can cost tens of thousands of dollars an hour. Then there’s ambient temperature and humidity. If you’re installing a pneumatic line in a hot, dusty mining yard, high temperatures can thin the air, reducing the blower’s efficiency, and dust can seep into seals and damage components. In contrast, if you’re working in a cold climate, moisture in the compressed air can freeze in the line, blocking material flow and causing corrosion. I learned this lesson early on: a customer in Canada installed a pneumatic line for grain transport in a uninsulated shed during the winter, and within a month, frozen water in the line had cracked a pipe, shutting down their operations for three days. Always check your site’s average temperature, humidity levels, and exposure to dust or moisture, and build in insulation, weather seals, or enclosure heaters where needed.
Now, moving on to the physical installation of the conveying piping itself — this is where most mistakes happen, even if you got the design right beforehand. First, pipe material and size. Pipes can be made of carbon steel, stainless steel, aluminum, or plastic, and the choice depends entirely on the material you’re moving and your site’s needs. For food or pharmaceutical applications, stainless steel is non-porous, easy to clean, and resistant to cross-contamination, while carbon steel works well for abrasive materials like ore or coal, though it needs regular maintenance to prevent corrosion. Pipe size is even more critical: if the pipe is too small, the air velocity will be too high, leading to excessive wear on the pipe walls and higher energy costs. If it’s too big, the air velocity will be too low, so materials will settle and clog the line. We always work with customers to calculate the exact pipe size based on their material’s density, particle size, and flow rate, and I can’t tell you how many times I’ve had a customer cut corners by using a slightly smaller pipe to save on material costs, only to have clogs start within the first week of operation.
Then there’s pipe routing and bends. The layout of your pneumatic line has to be as straight as possible, with as few vertical lifts and sharp bends as possible. Every time you change direction, you create friction that slows down the air and can cause materials to build up. If you need to turn a corner, use long-radius bends — at least 10 times the pipe’s diameter — instead of tight 90-degree elbows. That’s a rule I learned from a customer who had a pneumatic line with four sharp bends near the discharge point: every two weeks, the line would clog, and they had to shut down operations to clean it out. We replaced the tight bends with long-radius ones, and the clogging stopped entirely. Also, make sure you leave access points — clean-out valves — every 50 to 100 feet along the line, and at the bottom of all vertical sections. These access points let you clear clogs quickly without having to take the entire line apart. I’ve also noticed that many customers confuse pneumatic lines with mechanical conveyors like conveyor systems; for example, if you’re moving small, lightweight parts, a powered roller conveyor might be a simpler solution, but for bulk powders that need to move quickly through a factory, pneumatic lines are far more efficient — as long as you route them correctly.
Next, component installation and integration. Your pneumatic line isn’t just pipes — it’s a system that relies on feeders, blowers, filters, and controls to work together, and installing each component correctly is non-negotiable. Let’s start with the feeder, which is responsible for feeding materials into the air stream at a consistent rate. If the feeder is installed too high or too low, or if there’s a gap between the feeder and the pipe, air will leak out, reducing line pressure and causing clogs. We always recommend using a rotary airlock feeder, which is designed to create an airtight seal while moving material into the line, and installing it level with the main pipe to eliminate gaps. Then there’s the blower unit: it needs to be mounted on a vibration-dampening pad to reduce noise and prevent vibration from damaging the pipes and other components. If the blower is not properly anchored, the vibration can cause pipes to shift, leading to leaks and misalignment over time. Most customers don’t realize how important this is until they notice a loud rattling noise coming from the line, and we have to come out to re-anchor the blower and realign the pipes.
Filters are another critical component, especially if you’re working in a facility where air quality is a concern — like a food or pharmaceutical plant, where material dust can contaminate the air or the final product. The filter needs to be installed at the discharge end of the line, and sized correctly to handle the volume of air moving through the system. If the filter is too small, it will clog quickly, leading to back pressure and reduced flow. It also needs to be mounted at a slight downward angle so that collected material can be easily drained back into the process, instead of building up in the filter. I once worked with a bakery that installed a filter in a horizontal position, and within a week, flour dust had built up in the filter, leading to a fire hazard (flour dust is highly combustible, by the way — that’s another reason to get installation right). We repositioned the filter at an angle, and added a discharge valve, which eliminated the buildup and the safety risk. Also, don’t forget about the controls: a programmable logic controller (PLC) to automate the system, with pressure and flow sensors that alert you to clogs or leaks before they cause downtime. Many small operators skip the PLC to save money, but manually monitoring pressure gauges leads to more missed issues and more unplanned stops.
Surface preparation and installation methods are two more areas that can make or break your pneumatic line’s performance. When you’re connecting pipes, you can’t just screw them together — you need to ensure a tight, airtight seal, because even a small leak will reduce line pressure and cause inconsistent material flow. For metal pipes, that means using gaskets made of material compatible with your product (silicone for food applications, neoprene for abrasive materials) and torquing bolts to the manufacturer’s specifications to avoid over-tightening (which can crack pipes) or under-tightening (which causes leaks). For plastic pipes, you need to use solvent cement designed for that specific type of plastic, and let the cement cure completely before pressurizing the line — rushing that step leads to weak joints that break or leak over time. I’ve had a customer try to use regular PVC cement for their line, and within a month, the joints started leaking, leading to moisture buildup in the line and spoiling the plastic pellets they were moving.
Surface preparation for the pipe supports is also key. If you’re mounting pipes on walls or ceiling brackets, the supports need to be strong enough to hold the full weight of the pipe, the material inside, and any vibration from the blower. For steel pipes, that means using heavy-duty steel brackets, and making sure they’re anchored to structural walls or ceiling joists, not just drywall (which can’t support the weight). For lines that run horizontally, add supports every 8 to 10 feet, and for vertical lines, add supports every 12 to 15 feet. Too few supports, and the pipe will sag, leading to bends that disrupt air flow. I’ve seen a line where the supports were spaced 20 feet apart, and the sag in the middle caused material to settle, leading to a clog that shut down the plant for a day. Again, it’s worth noting that mechanical conveyors like warehouse roller conveyor systems have different support requirements — they need to hold the weight of the rollers and the products, so their spacing is different, but for pneumatic lines, consistent, spaced supports are non-negotiable.
Finally, testing and commissioning — this is the step that many suppliers and customers skip, leading to problems after the line is up and running. Once you’ve installed all the components, you can’t just turn the blower on and start moving materials. You need to do a pressure test first: pressurize the line to its maximum operating pressure, and check all joints, gaskets, and connections for leaks using a soapy water solution. If bubbles form, you’ve got a leak, and you need to fix it before moving on. Then, do a dry run with air only, without materials, to check air velocity and pressure across the entire line. Use a manometer to measure pressure at multiple points along the line, and adjust the blower speed or pipe size if the pressure is too low or too high. Once the dry run works, do a test run with a small amount of your material, starting at a slow feed rate, and monitoring for clogs, leaks, or inconsistent flow. Make adjustments as needed — for example, if a certain bend is causing clogs, increase the radius of that bend, or adjust the feeder speed. I always tell customers that commissioning isn’t a one-and-done step — it’s a process of tweaking the system to fit their specific needs, and taking the time to do it right will save them months of headaches later.
Now, let’s talk about why all this matters for your bottom line. A well-installed pneumatic conveying line will have lower energy costs, because it’s operating at optimal pressure and velocity, not working to compensate for leaks or clogs. It will have less downtime, because clogs are rare and components are properly installed and maintained. And it will be safer, because you’re reducing fire hazards from dust buildup, avoiding pressure leaks, and having the right access points to clear clogs quickly. Of course, pneumatic lines aren’t the right choice for every application — if you’re moving heavy, bulky items like pallets, a powered roller conveyor might be a better fit, and if you’re moving small, lightweight boxes, a warehouse belt conveyor is often simpler and more cost-effective. But when it comes to moving bulk dry materials quickly, safely, and efficiently, pneumatic lines are hard to beat — as long as you follow the installation requirements I’ve outlined here.
At the end of the day, installing a pneumatic conveying line is an investment in your operations, and cutting corners on installation will only cost you more in the long run. As a conveying line supplier, I work with every customer to walk through their site-specific needs, from space and utilities to material type and flow rate, to make sure their installation is done right the first time. If you’re considering a pneumatic line for your facility, or if you have questions about how to get the most out of your existing system, reach out to our team to discuss your needs. We don’t just sell equipment — we help you design and install a system that works for your unique operations, so you can focus on growing your business, not fixing conveyor issues.


References
- Bulk Material Handling & Conveying: A Guide to Pneumatic Systems, Material Handling Industry Association, 2022.
- Installation Best Practices for Pneumatic Conveying Lines, Powder Handling and Processing Magazine, Vol. 34, No. 2, 2021.
- Safety Standards for Dust Conveying Systems, Occupational Safety and Health Administration (OSHA), 2023.
- Conveyor System Selection Guide: Pneumatic vs. Mechanical Conveyors, Modern Materials Handling, 2022.